Working principle:
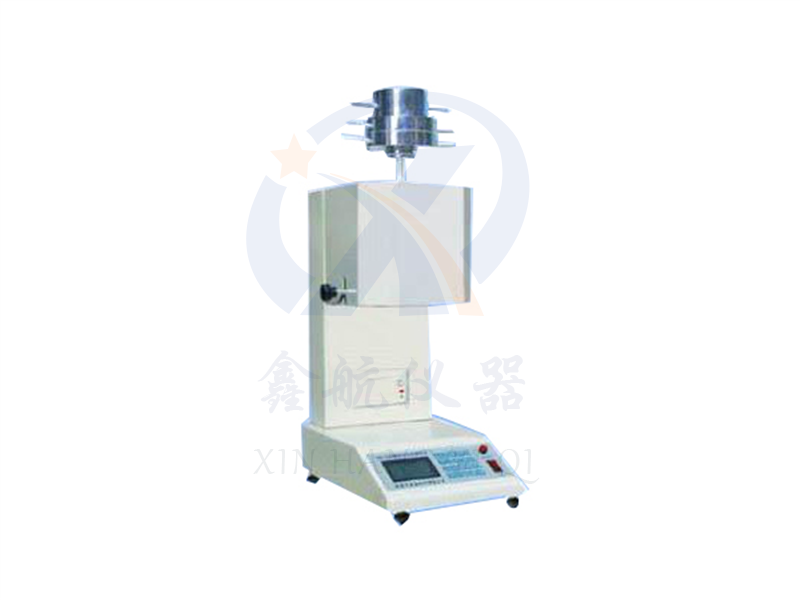
A melt flow rate meter is a device that uses a high-temperature heating furnace to achieve a molten state of the measured object under specified temperature conditions. The tested object in this molten state is subjected to extrusion testing through a small hole of a certain diameter under the specified weight load gravity. In the plastic production and research of industrial enterprises and research institutions, the "melt (mass) flow rate" is often used to represent the physical properties of polymer materials such as fluidity and viscosity in the molten state. The melt flow rate refers to the average mass of each section of the extruded sample converted into 10 minutes of extrusion volume. The flow rate of the melt (mass) is expressed in MFR, in grams per 10 minutes (i.e. g/min)
Formula representation: MFR( θ、 Mnom=tref x m/t=600 x m/t (g/10min)
In the formula: θ—— Test temperature
Mnom - nominal load Kg
M - average mass of cut off g
Tref - reference time (10min): 600
T - The time interval for cutting off, in seconds.
Example: A group of plastic samples, cut into sections every 30 seconds, and the results of the mass of each section are: 0.081 g, 0.086 g, 0.081 g, 0.089 g, 0.082 g.
The average mass of the cut off m=(0.081 0.086 0.081 0.089 0.082) ÷ 5=0.0838 ≈ 0.084 (grams)
Substitution formula: MFR=600 x 0.084/30=1.680 (grams/10 minutes)
Application industry:
Applicable to the production and research of factories, enterprises, and research institutions.
Meets standards:
This machine is designed and manufactured in accordance with the requirements of GB/T3682-2000
Technical parameters:
|
Squeezing and discharging section
|
|
Discharge port diameter
|
Φ 2.095 ± 0.005 mm
|
|
Discharge port length
|
8.000 ± 0.025 mm
|
|
Loading cylinder diameter
|
Φ 9.550 ± 0.025 millimeters
|
|
Loading cylinder length
|
152 ± 0.1 millimeters
|
|
Diameter of piston rod head
|
9.475 ± 0.015 mm
|
|
Length of piston rod head
|
6.350 ± 0.100 mm
|
|
1. Standard Test Load (Level 8)
|
|
Level 1
|
0.325kg=(piston rod weight tray insulation sleeve No.1 weight body)
|
|
Level 2
|
1.200 kg=(0.325 No.2 0.875 weight)
|
|
Level 3
|
2.160 kg=(0.325 No.3 1.835 weight)
|
|
Level 4
|
3.800 kg=(0.325 No. 4 3.475 weight)
|
|
Level 5
|
5.000 kg=(0.325 No. 5 4.675 weight)
|
|
Level 6
|
10.000 kg=(0.325 weight 5, 4.675 weight 6, 5.000 weight)
|
|
Level 7
|
12.500 kg=(0.325 weight 5, 4.675 weight 6, 5.000 weight 7, 2.500 weight)
|
|
Level 8
|
21.600 kg=(0.325 No.2 0.875 No.3.835 No.4)
|
|
3.475, 5, 4.675, 6, 5.000, 7, 2.500, 8, 2.915 weights)
Relative error of test load ≤ 0.5%
|
|
Measurement method
|
Quality Method (MFR)
|
|
Constant temperature range
|
Room temperature -450 ℃
|
|
Temperature accuracy
|
± 0.2 ℃
|
|
Temperature resolution
|
0.1 ℃
|
|
Timing range
|
0.1-999 seconds
|
|
Timing accuracy
|
0.1 seconds
|
|
Cutting method
|
Automatic and manual cutting methods
|
|
Display method
|
LCD display
|
|
Printing
|
Equipped with a printer, capable of printing test reports
|
|
Working environment conditions
|
Environmental temperature: 10 ℃ -40 ℃; The relative humidity of the environment is 30% -80%
|
|
Instrument dimensions
|
250 x 350 x 510 (length x width x height)
|


